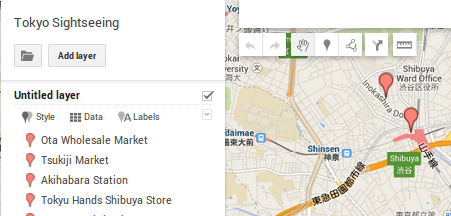
After you've created a map in Google Maps, the next step in the marker transfer process is to get the markers onto your local drive in a format recognized by GPSPrune. Click the folder icon in the upper left hand corner of your map and select "Export to KML".
Plug your GPS into the USB port and power it up. Next is a critical step that took me a while to figure out. The GPSPrune application needs access to the USB port. You could bring up a terminal and type "sudo GPSPrune" to run as super user; but don't do that. Here's the right way. Most of the info on how get GPSPrune talking to the Garmin came from this page: http://wiki.openstreetmap.org/wiki/USB_Garmin_on_GNU/Linux
First, from the console, add your user to the lp group.
sudo adduser <my_user> lp
Next type:
lsusb -v | more
This will get you information on your GPS:
Bus 005 Device 004: ID 091e:0003 Garmin International GPS (various models)
Now create and edit a USB permissions rules file.
sudo nano /etc/udev/rules.d/51-garmin.rules
And then input and save the following vendor and product IDs along with the new access mode.
ATTRS{idVendor}=="091e", ATTRS{idProduct}=="0003", MODE="666"
To activate the changes run:
sudo udevadm control --reload-rules
The markers should appear on your GPS as waypoints. Here's the amazing thing about it. The marker field in Google Maps is much longer that the eTrex waypoints string. Either GPSPrune or GPSBabel (which does some of the behind-the-scenes work) abbreviates everything intelligently. For example, "Center" becomes "CNTR". I didn't need to shorten any strings beforehand.
Once I figured it out, it was a pretty easy and quick process.


No comments:
Post a Comment